Sashimi X-Wing
expertSashimi X-Wing is a variation of the X-Wing strategy. It arises when an X-Wing pattern is nearly complete, but one corner has a missing candidate, a shifted candidate, or an extra candidate. Despite this imperfect X-Wing formation, the pattern still enables the elimination of candidates that see all the cells of the malformed corner.
Sashimi X-Wing is an advanced variation of the X-Wing strategy. This pattern occurs when an X-Wing is nearly formed, but one corner has a missing candidate, a shifted candidate, or an extra candidate. Despite this incomplete formation, the pattern still allows for eliminations. Sashimi X-Wing is sometimes also referred to as Finned X-Wing.
Understanding Sashimi X-Wing with Illustrations
Illustration 1:
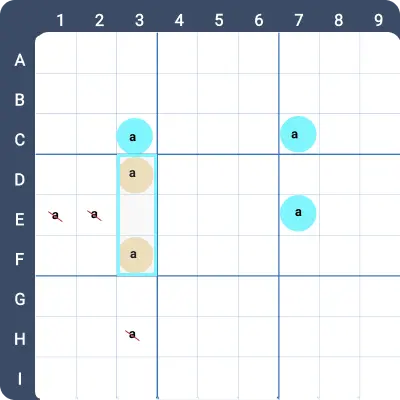
In the illustration below, cells C3, C7, F3, and F7 would form a perfect X-Wing on digit a across rows C and F if the a in F1 wasn’t present. This pattern is known as a Sashimi X-Wing, where F1 is the fin (or sashimi).
- If C3 = a, then C7 ≠ a, leading to F7 = a.
- The key distinction in Sashimi X-Wing: If C7 = a, then F7 ≠ a, meaning either F3 or F1 must be a.
This implies either C3 = a, or one of F1 or F3 is a. As a result, you can eliminate all occurrences of a that see all the cells C3, F1, and F3.

Illustration 2:
In the following illustration, another Sashimi X-Wing is formed on digit a in columns 3 and 7. Here, D3 and F3 are the fins.
- If C3 = a, then C7 ≠ a, resulting in E7 = a.
- Alternatively, if C3 ≠ a, then either D3 or F3 must be a.
This means either E7 = a, or one of D3 or F3 is a. Since E1 and E2 see all three cells E7, D3, and F3, you can eliminate a from E1 and E2.
Example 1:
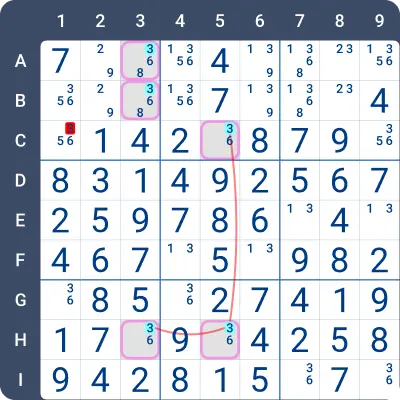
The image below illustrates a Sashimi X-Wing setup on the digit 3 in columns 3 and 5.
- If C5 = 3, then C5 ≠ 3 leads to H5 = 3, which implies H3 ≠ 3.
- Consequently, either A3 = 3 or B3 = 3.
This means one of C5, A3, or B3 must be 3. The 3 in C1 sees all these cells, so it can be eliminated.
Example 2:
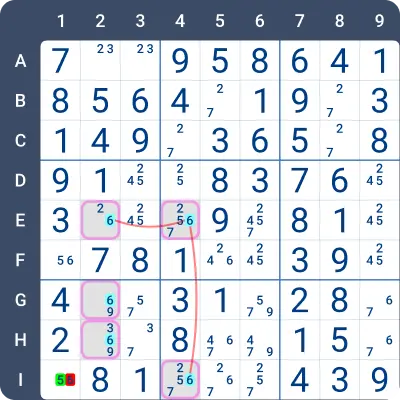
Here’s another example of a Sashimi X-Wing for the digit 6 in columns 2 and 4. Can you figure out the elimination?
Practise this strategy with built-in step-by-step hints inside our apps.